
10
七月9 . What Your Parents Taught You About Fascia Installation
Fascia Installation: A Comprehensive Guide
Fascia installation plays an essential role in both the aesthetics and functionality of a building. It describes the board that runs horizontally along the edges of a roofline, supplying a neat surface and assisting in the attachment of seamless gutters. The selection of materials, styles, and correct installation techniques can significantly impact the durability and look of a structure. This article supplies an in-depth appearance at fascia installation, detailing the materials normally used, a step-by-step installation process, possible challenges, and often asked questions.
Table of Contents
- Comprehending Fascia
- Meaning
- Kinds Of Fascia Materials
- Tools and Materials Needed for Installation
- Step-by-Step Guide to Installing Fascia
- Common Challenges and How to Overcome Them
- FAQs About Fascia Installation
- Conclusion
1. Understanding Fascia
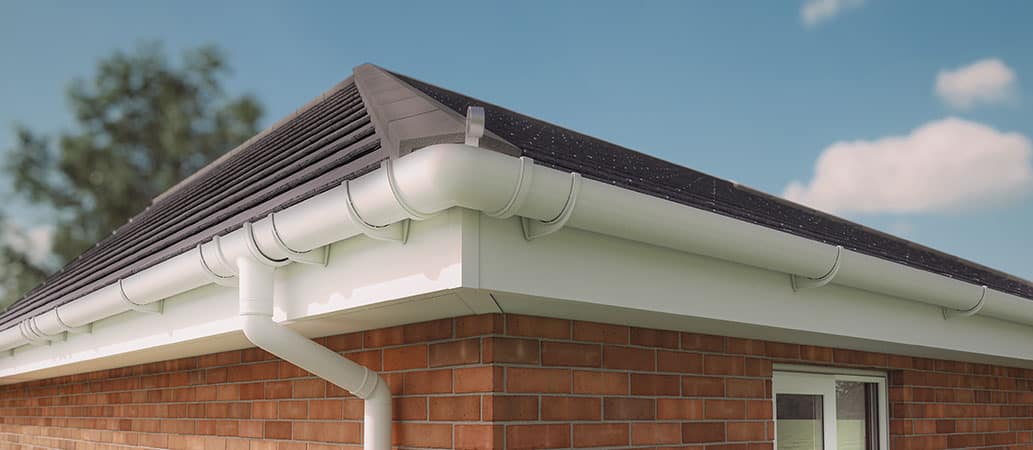
Meaning
Fascia is the horizontal board that covers completions of roofing system rafters. It offers a finished appearance while also serving numerous functional functions, including supporting the roofing system and protecting rain gutters.
Types of Fascia Materials
Several products can be utilized for fascia installation, each with its own advantages:
| Material | Advantages | Disadvantages |
|---|---|---|
| Wood | Natural aesthetic appeals, paintable, simple to deal with | Susceptible to rot and pests, needs maintenance |
| Vinyl | Low maintenance, resistant to fading and decomposing | Can be less long lasting than wood, limited design alternatives |
| Aluminum | Durable, resistant to rust, low maintenance | Can dent easily, minimal color choices |
| Composite | Resistant to rot and bug damage | Greater preliminary cost, can look less authentic |
| PVC | Really resilient, simple to set up | More expensive than wood or vinyl, not widely offered |
2. Tools and Materials Needed for Installation
Before starting fascia installation, it is important to gather the necessary tools and products to ensure the job goes smoothly. Here's a list of items you will require:

Tools:
- Tape measure
- Miter saw
- Hammer or nail weapon
- Level
- Caulking gun
- Ladder
- Security safety glasses
- Drill
Materials:
- Fascia board (product of choice)
- Nails or screws
- Caulk or sealant
- Gutter system (if applicable)
3. Step-by-Step Guide to Installing Fascia
The installation of fascia can be done as a DIY job. Here's a detailed guide on how to effectively set up fascia:
Step 1: Preparation
- Check the Roof: Before start, ensure the roof structure is sound. Search for any indications of damage or rot that might require attention.
- Step the Length: Using a tape step, determine the total length needed for the fascia boards.
Step 2: Cut the Fascia Boards
- Cut the Boards: Use a miter saw to make cuts at the suitable lengths. Make angled cuts at corners for a neat finish.
Action 3: Position the Fascia Boards
- Hold the Board in Place: Position the fascia board against the roofing edge and use a level to guarantee it is directly.
Step 4: Fasten the Boards
- Nailing: Secure the fascia board into place utilizing nails or screws. This includes nailing through the board into the rafter ends. Make sure that the fasteners are spaced roughly 24 inches apart.
Step 5: Seal the Joints
- Apply Caulk: Around the joints, apply caulk or sealant to avoid water seepage, making sure the longevity of the set up fascia.
Step 6: Install Gutters (if applicable)
- Attach Gutters: If you're also installing gutters, attach them straight beneath the fascia to make sure appropriate drain.
Action 7: Final Inspection
- Inspect Alignment: After installation, do a final check to make certain whatever is aligned correctly and firmly secured.
4. Typical Challenges and How to Overcome Them
Installation may not always go as prepared, and it's important to be prepared for common obstacles:
- Misalignment: If the fascia boards appear uneven, verify the level and compare all measurements before securing.
- Incorrect Cutting: Always validate measurements before cutting. If cuts are too brief, it will need purchasing brand-new products.
- Climate condition: Plan your installation day carefully to avoid rain or high winds, which can compromise quality and safety.
5. Frequently Asked Questions About Fascia Installation
Q1: How do I understand which material to pick for fascia?A1: Choosing the right material depends upon your spending plan, environment, and preferred aesthetic. Wood offers a natural look, while vinyl and aluminum provide low maintenance. Q2: Can I set up fascia by myself, or do I need professional help?A2: Installing fascia can be performed as a DIY project if you are comfy operating at heights and utilizing tools. However, employing a professional is a good idea for complex architectures. Q3: How often must fascia be replaced?A3: The life-span of fascia boards can vary. Wooden fascia might need replacement
every 10-20 years, while vinyl and aluminum can
last for decades if preserved appropriately. Q4: Do I require authorizations to set up fascia?A4: Check with your regional building department. Many locations do not need licenses for fascia installation, but it's essential to confirm. Q5: What
maintenance is required for fascia?A5: Regular inspections for rot or degeneration, particularly in wood, and cleansing or repainting as needed. 6.
Conclusion Fascia installation may appear difficult,
but with cautious preparation and understanding of materials and strategies, it can be a rewarding DIY task or a straightforward task for professionals. Correct installation not only improves the visual appeal of your home however likewise makes sure structural stability, particularly regarding water management through gutters. When handling your fascia installation job, keep in mind to follow security procedures and, when in doubt, consult with or work with a professional to guarantee the very best possible result.
Reviews